Home
Help Center
Email Marketing Service
Quick Setup Guide
A short instruction to start your email marketing journey
Understanding domain statuses: Verified, Processing, Unverified
Managing sending domains
Why DNS records matter for email deliverability
Adding & verifying DNS records (SPF, DKIM, DMARC)
Checking & resolving domain blacklist issues
Managing sender email addresses
Sender address requirements and best practices
What to do if a sender address is in use by active campaigns
Understanding shared vs. dedicated IP addresses
Connecting or disconnecting a domain to/from an IP address
Buying & managing dedicated IP addresses
User roles & statuses
User status explained: active and deleted users
How to add a new user: user invitations and registration
Managing user permissions and access rights
Default permissions for additional users
Deleting users
Transferring admin rights to another user
What happens after admin rights are transferred?
What happens when permissions are disabled for a user?
How to create your first email campaign
Campaign card overview: General, Contacts, Email template, Scheduler
Naming and renaming campaigns
Understanding campaign statuses: Waiting, In progress, Paused, Finished
Saving progress and navigating between campaign blocks
How to set up the sender email address and name
Managing reply-to addresses in campaigns
Selecting and managing IP addresses for sending
How to select recipients: Contacts, Groups, Segments
Excluding contacts and groups from a campaign
Understanding contact limits and subscription packages
What to do if you exceed your email sending limit
Validating contacts before sending: Email Checker explained
Choosing and editing email templates for campaigns
Uploading custom HTML
Writing effective subjects and preheaders
Adding and managing UTM parameters
Scheduling campaigns: send now or later
Setting up delivery dates, times, and days of the week
How to calculate and adjust sending volume over time
Managing dedicated IP expiration and renewal
How to preview and test your campaign
Managing and editing your test email group
Using the campaign calendar: viewing, filtering, and creating campaigns
Understanding campaign statuses: Active, Scheduled, Completed
Viewing campaign details and quick actions from the calendar
Navigating the campaign list: columns and filters
Searching and filtering campaigns by name, date, and status
Campaign card: overview, timeline, and audience
How to pause, continue, or delete a campaign
Understanding campaign statuses: Planned, Active, Paused, Finished
Campaign performance & analytics
Using heatmaps to analyze email engagement
Automations
Creating a New Automation
Understanding Automation Templates
Managing Your Automations List
Automation Builder: Overview and Navigation
Setting Up Automation Details (Name, Description, Tags)
Working with Triggers
Working with Actions
Managing Elements in the Workflow Canvas
Running and Pausing Automations
Automation Settings Panel
Managing Emails and Templates Inside Automations
Contact Management Inside Automations
A short instruction to start your email marketing journey
This guide will help you get up and running with Sendigram EMS quickly — from setting up your account to make everything ready for the start of the first campaign.
1. Choose a Plan
- Go to Plans and pricing.
- Scroll down to the Plans section.
- Choose the plan that suits your needs and click Select.
2. Add Your Sending Domain
- Go to Account Settings → Domain Settings.
- Click on + Add domain and fill in your domain name.
- In the new window copy the TXT configuration record and add it as an entry in your hosting control panel.

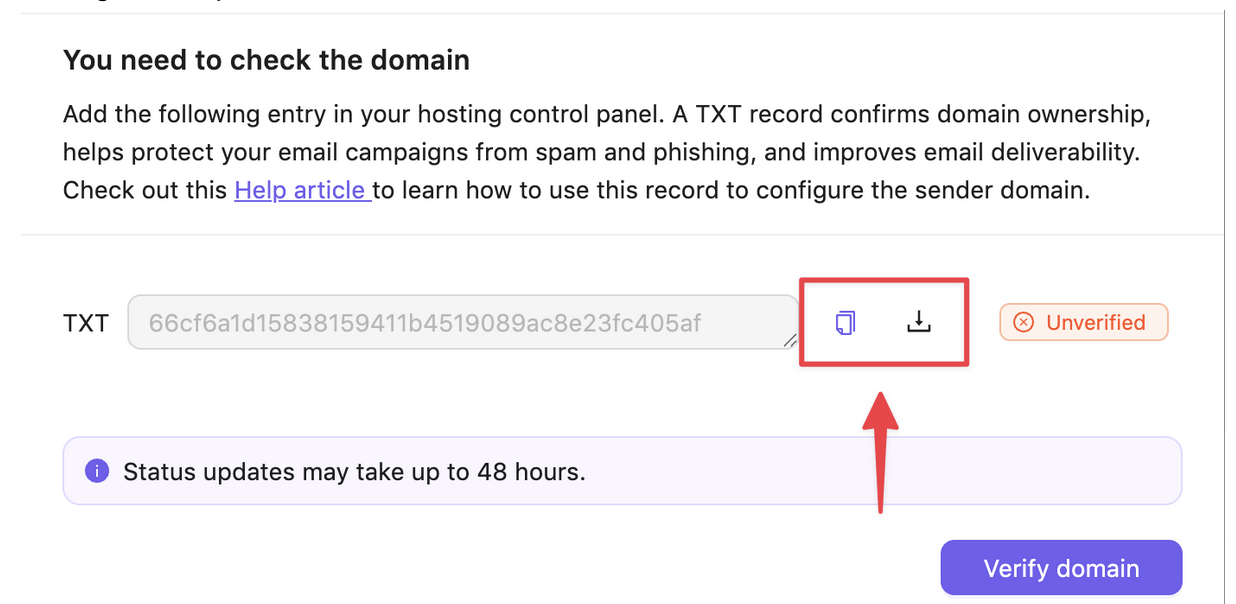
- Wait for verification (usually a few minutes, up to 48 hours).
- Once verified, assign the domain to your account.
3. Set Up Sender Email
- Go to Sender settings
- Switch to the Sender address tab

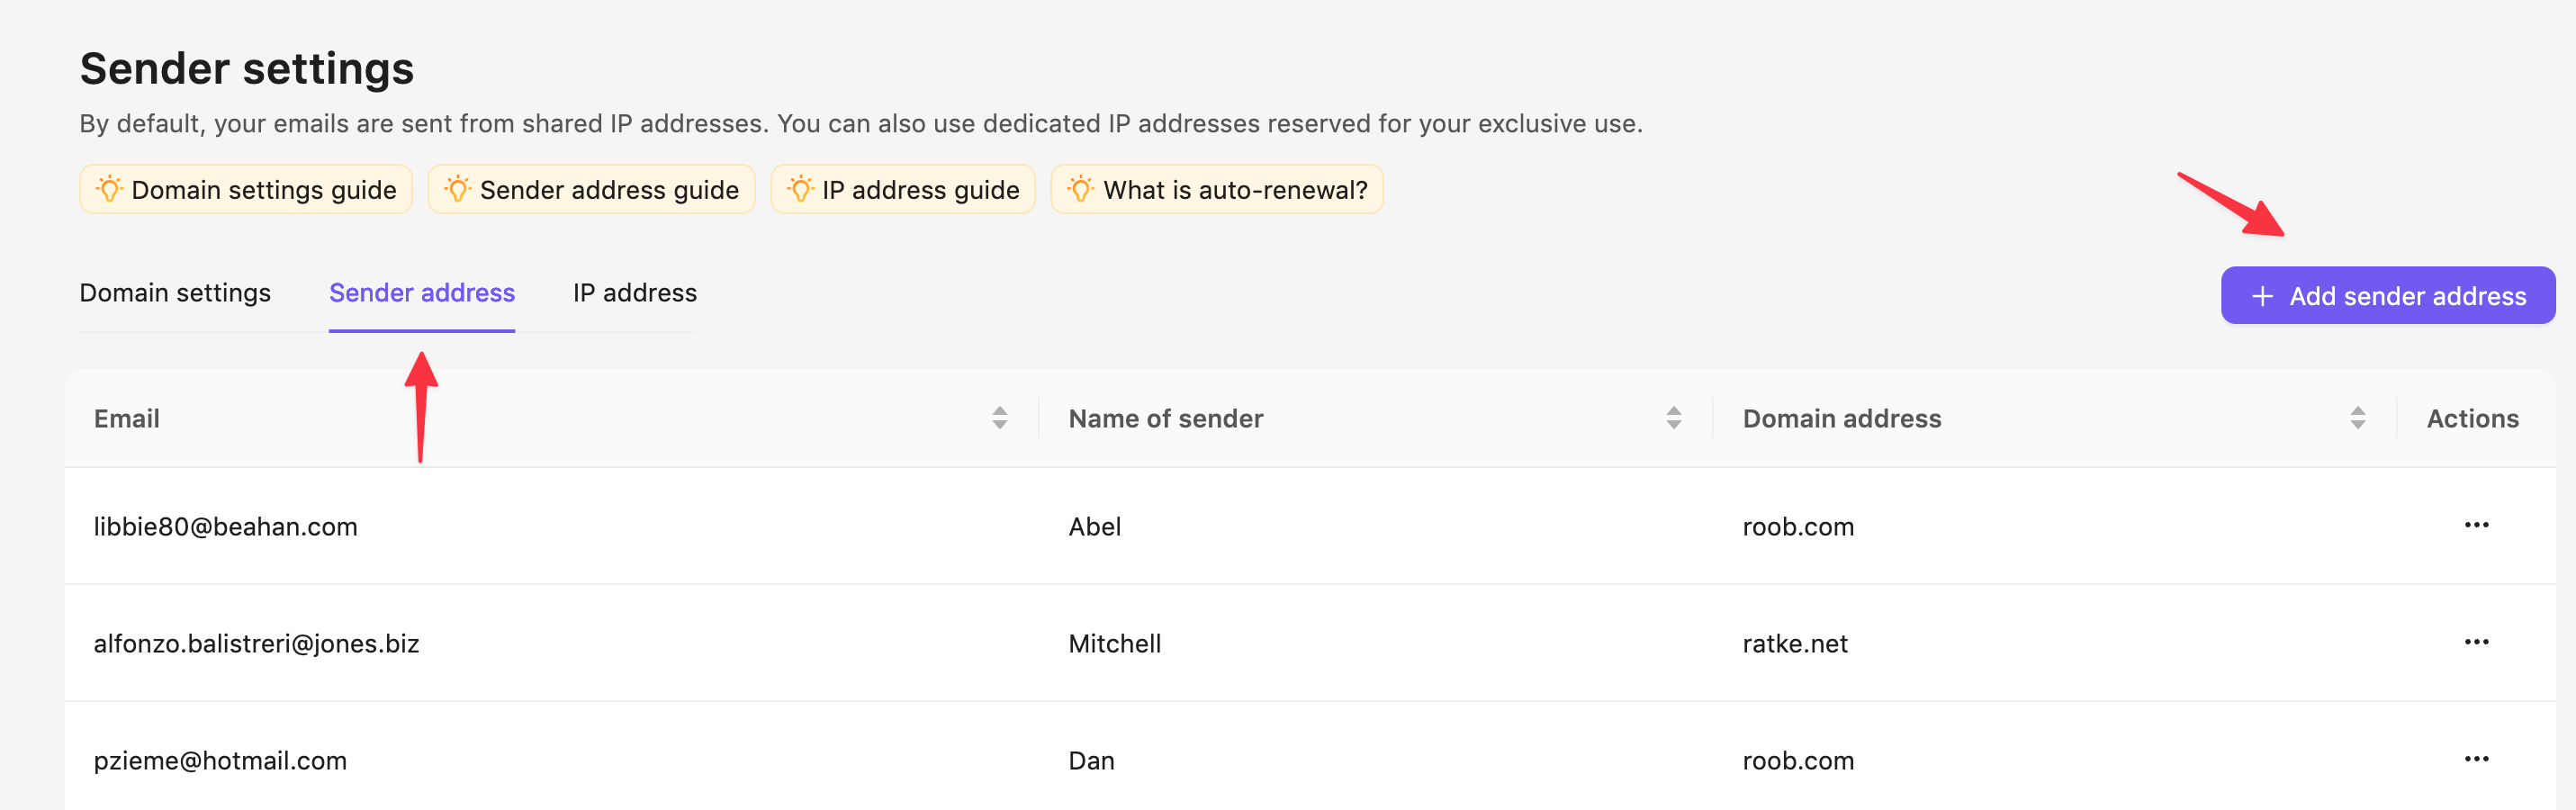
- Click Add sender address.
- Fill the Sender email address and Name of Sender fields.
- Choose the domain that will be associated with this sending address.
4. Import Your Contacts
To import contacts from a CSV file:
- Navigate to the "Contacts" section and choose “All contacts”.
- Click on the "Add contacts" button in the upper
corner. - Select the CSV file you want to import.
- Choose to add the contacts from the list to a group or assign tags if needed.
- Click "Add contacts" to begin the import process.
To add a single contact manually:
- Navigate to the "Contacts" section and choose “All contacts”.
- Click on the "Add contacts" button in the upper right corner and select “Add single contact”.
- Fill in the contact's information, such as their email address, name, and any other relevant details.
- Click "Add contact” to add the new contact to your list.
That’s it! Now your Sendigram account is ready for starting your first email campaign. Feel free to explore and experiment with—and remember, that our AI companion is always ready to help!
Still have questions?